エキサイトの武藤です。
FlutterのRippleエフェクトの挙動について紹介します。
Rippleの種類
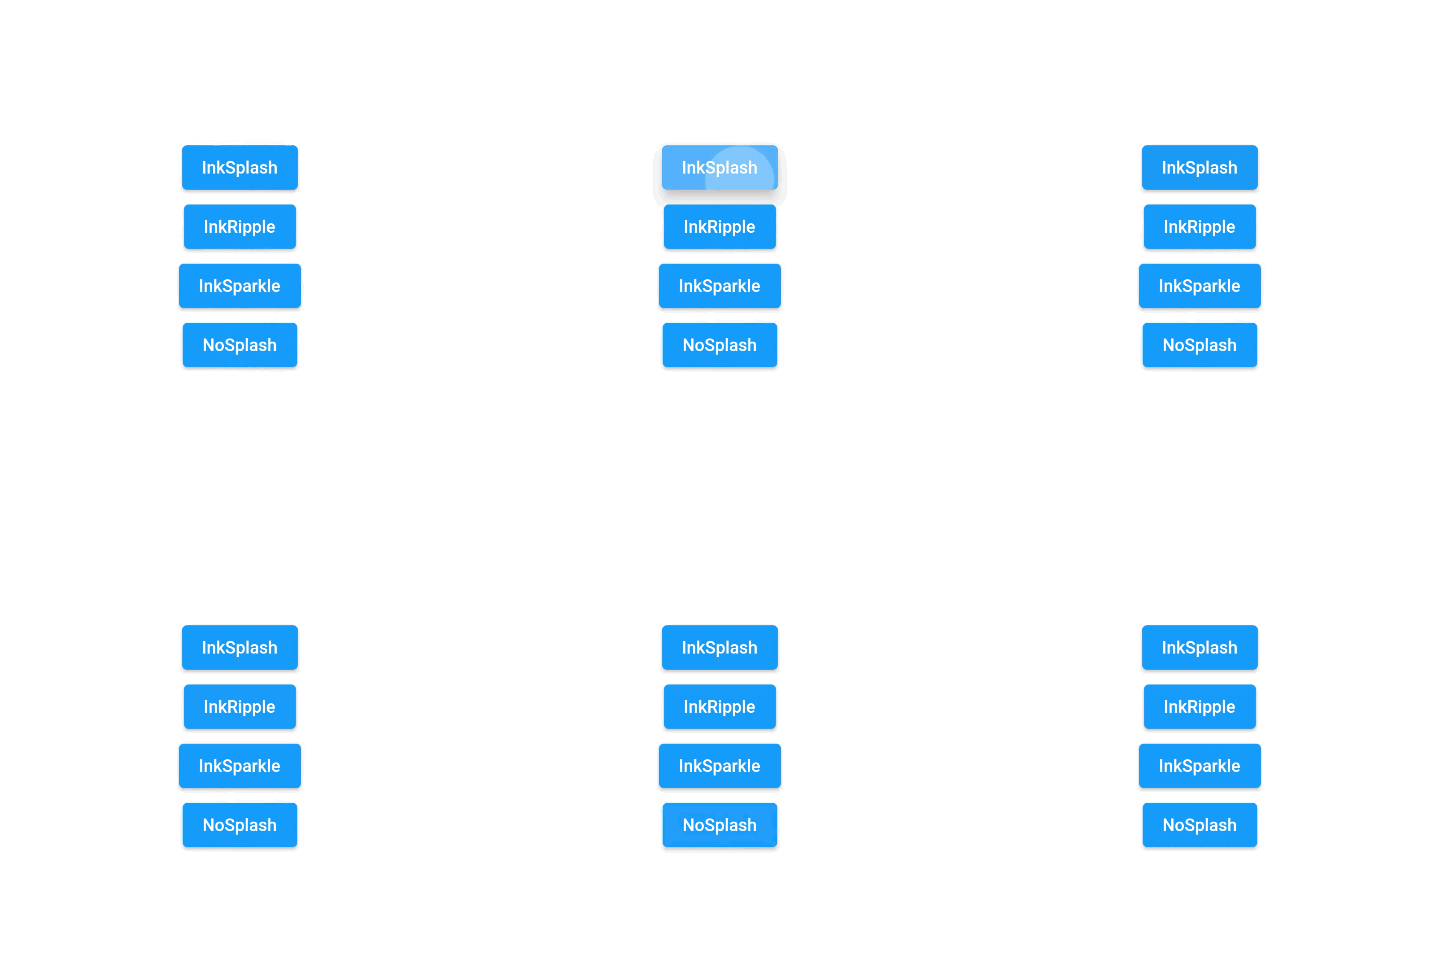
Button Widgetを例にRippleを確認してみます。 Rippleの表現には、いくつか種類があります。
- InkSplash
- InkRipple (デフォルト)
- InkSparkle
- NoSplash
それぞれを比較してみます。

InkSplash < InkRipple < InkSparkleの順で、波紋の広がりが早くなっています。 デフォルトでは、InkRippleの挙動になります。
NoSplashはRippleを無効にします。
サンプルコードです。
ElevatedButton(
  onPressed: () {},
  style: ElevatedButton.styleFrom(
    backgroundColor: Colors.blue,
    splashFactory: InkSplash.splashFactory
  ),
  child: Text('Button'),
)
引数splashFactory から設定を変更できます。
ListViewのRipple表示
ListViewでは、子要素にImageやText Widgetを組み合わせたレイアウトを使うと思います。 それら子要素に対するRipple表示について紹介します。
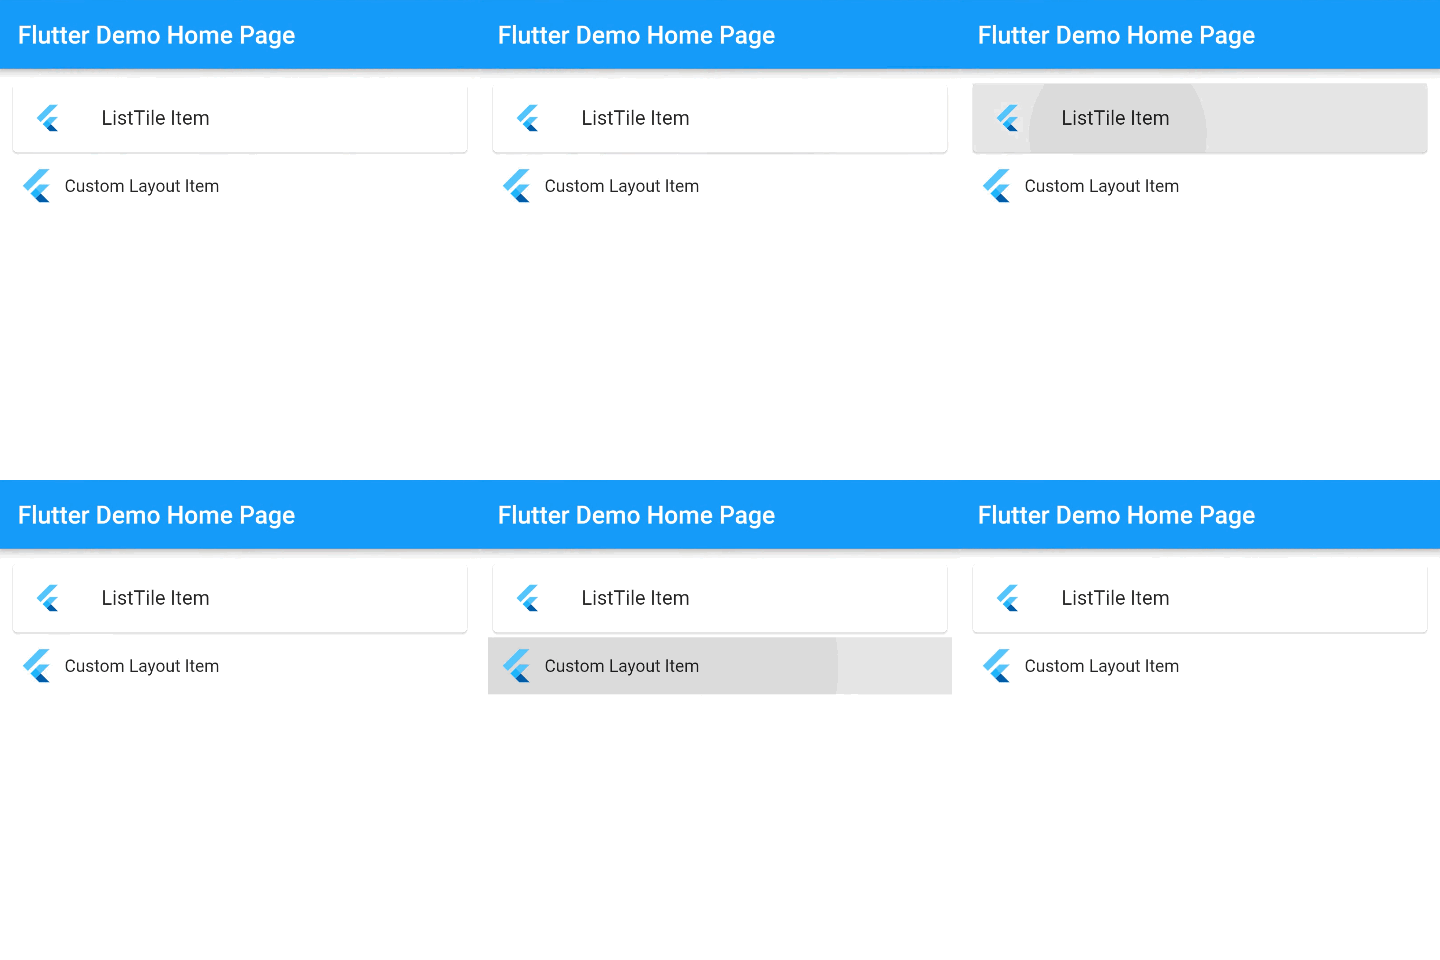
ListTile, 独自レイアウトの場合
ListTileや独自で組んだレイアウトです。

サンプルコードです。
ListView(
  padding: const EdgeInsets.all(8),
  children: [
    Ink(
      child: Card(
        child: ListTile(
          leading: FlutterLogo(),
          title: Text('ListTile Item'),
          onTap: () {},
        ),
      ),
    ),
    InkWell(
      onTap: () {},
      child: Row(
        mainAxisAlignment: MainAxisAlignment.start,
        children: [
          Padding(
            padding: const EdgeInsets.all(8.0),
            child: SizedBox(
              height: 30,
              width: 30,
              child: FlutterLogo(),
            ),
          ),
          Text('Custom Layout Item'),
        ],
      ),
    )
上のListTileの場合は、上位にInkを設置して、Rippleを表示しています。
下の独自レイアウトの場合は、上位にInkWellを設置します。
Imageの上にTextを重ねたレイアウト
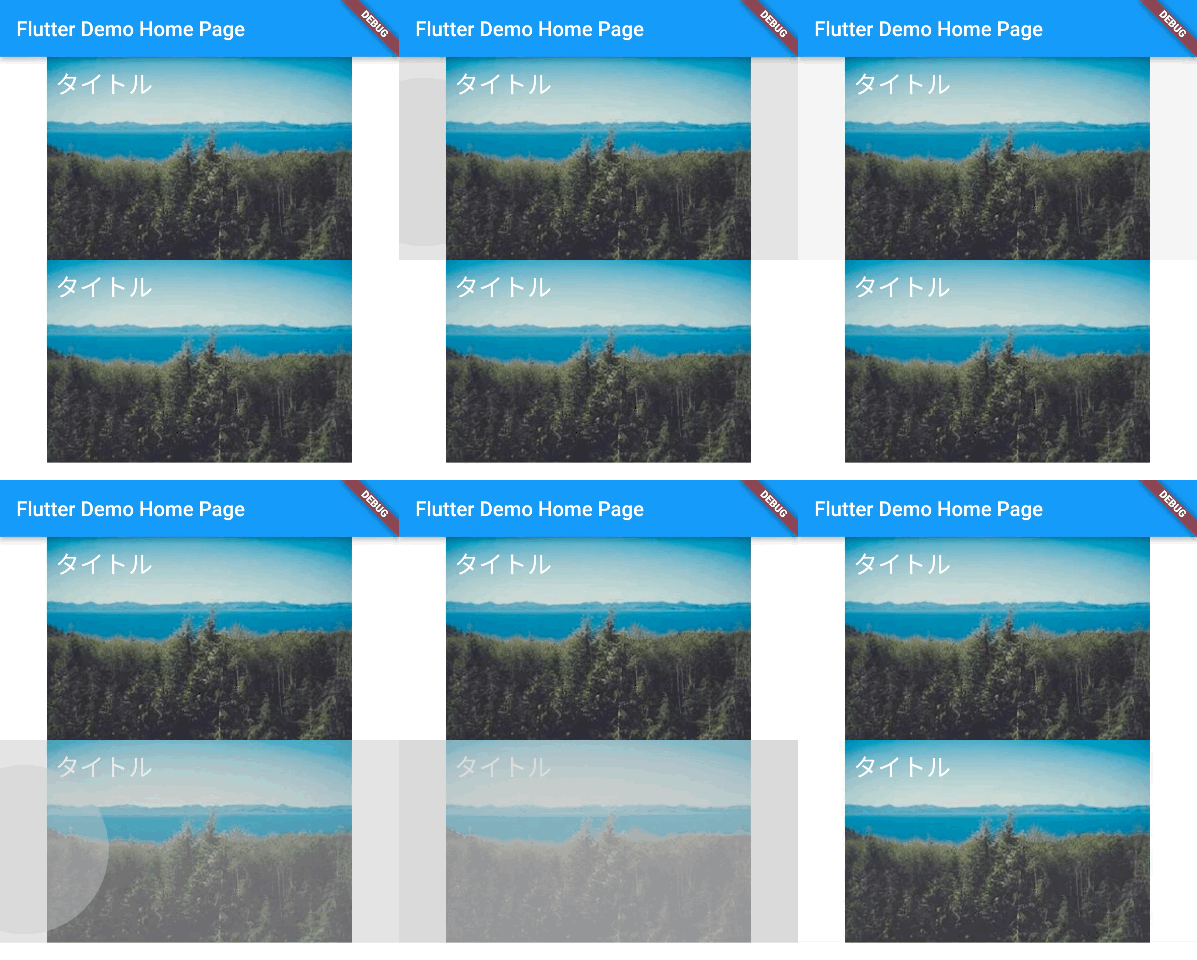
大きめのサムネイルにタイトルテキストを乗せたUIです。 Stackを使って、その子要素にImageとTextを重ねて実装すると思います。
このUIに対してRippleエフェクトを表示してみます。

サンプルコードです。
ListView(
  children: [
    InkWell(
      onTap: () {},
      child: Center(
        child: Stack(
          children: [
            Image.network(
              'https://picsum.photos/300/200?image=10',
            ),
            const Padding(
              padding: EdgeInsets.all(8.0),
              child: Text(
                'タイトル',
                style: TextStyle(
                  fontSize: 24,
                  color: Colors.white,
                ),
              ),
            ),
          ],
        ),
      ),
    ),
    Stack(
      children: [
        Center(
          child: Stack(
            children: [
              Image.network(
                'https://picsum.photos/300/200?image=10',
              ),
              const Padding(
                padding: EdgeInsets.all(8.0),
                child: Text(
                  'タイトル',
                  style: TextStyle(
                    fontSize: 24,
                    color: Colors.white,
                  ),
                ),
              ),
            ],
          ),
        ),
        Positioned.fill(
          child: Material(
            color: Colors.transparent,
            child: InkWell(
              onTap: () => {},
            ),
          ),
        ),
      ],
    ),
  ],
)
上のレイアウトでは、シンプルにStackの上位にInkWellを設置して実装しています。左右の余白にはエフェクトが表示されますが、Image上にはエフェクトが表示されません。
下のレイアウトでは、Image上にもエフェクトを表示させる実装です。 Stackのレイアウトの上に、さらにStackを設置します。上位のStackにMaterialとInkのWidgetを設置して、エフェクトを表示させています。
まとめ
FlutterのRippleエフェクトについて紹介しました。
タップ時の細かい挙動の話ですが、操作感に影響する要素の一つです。 効果的に使って、使いやすいアプリ、サービスを実現できればと思います。
こちらの記事が参考になれば幸いです。
採用情報
エキサイトではフロントエンジニア、バックエンドエンジニア、アプリエンジニアを随時募集しております。長期インターンも歓迎していますので、興味があれば連絡いただければと思います。
